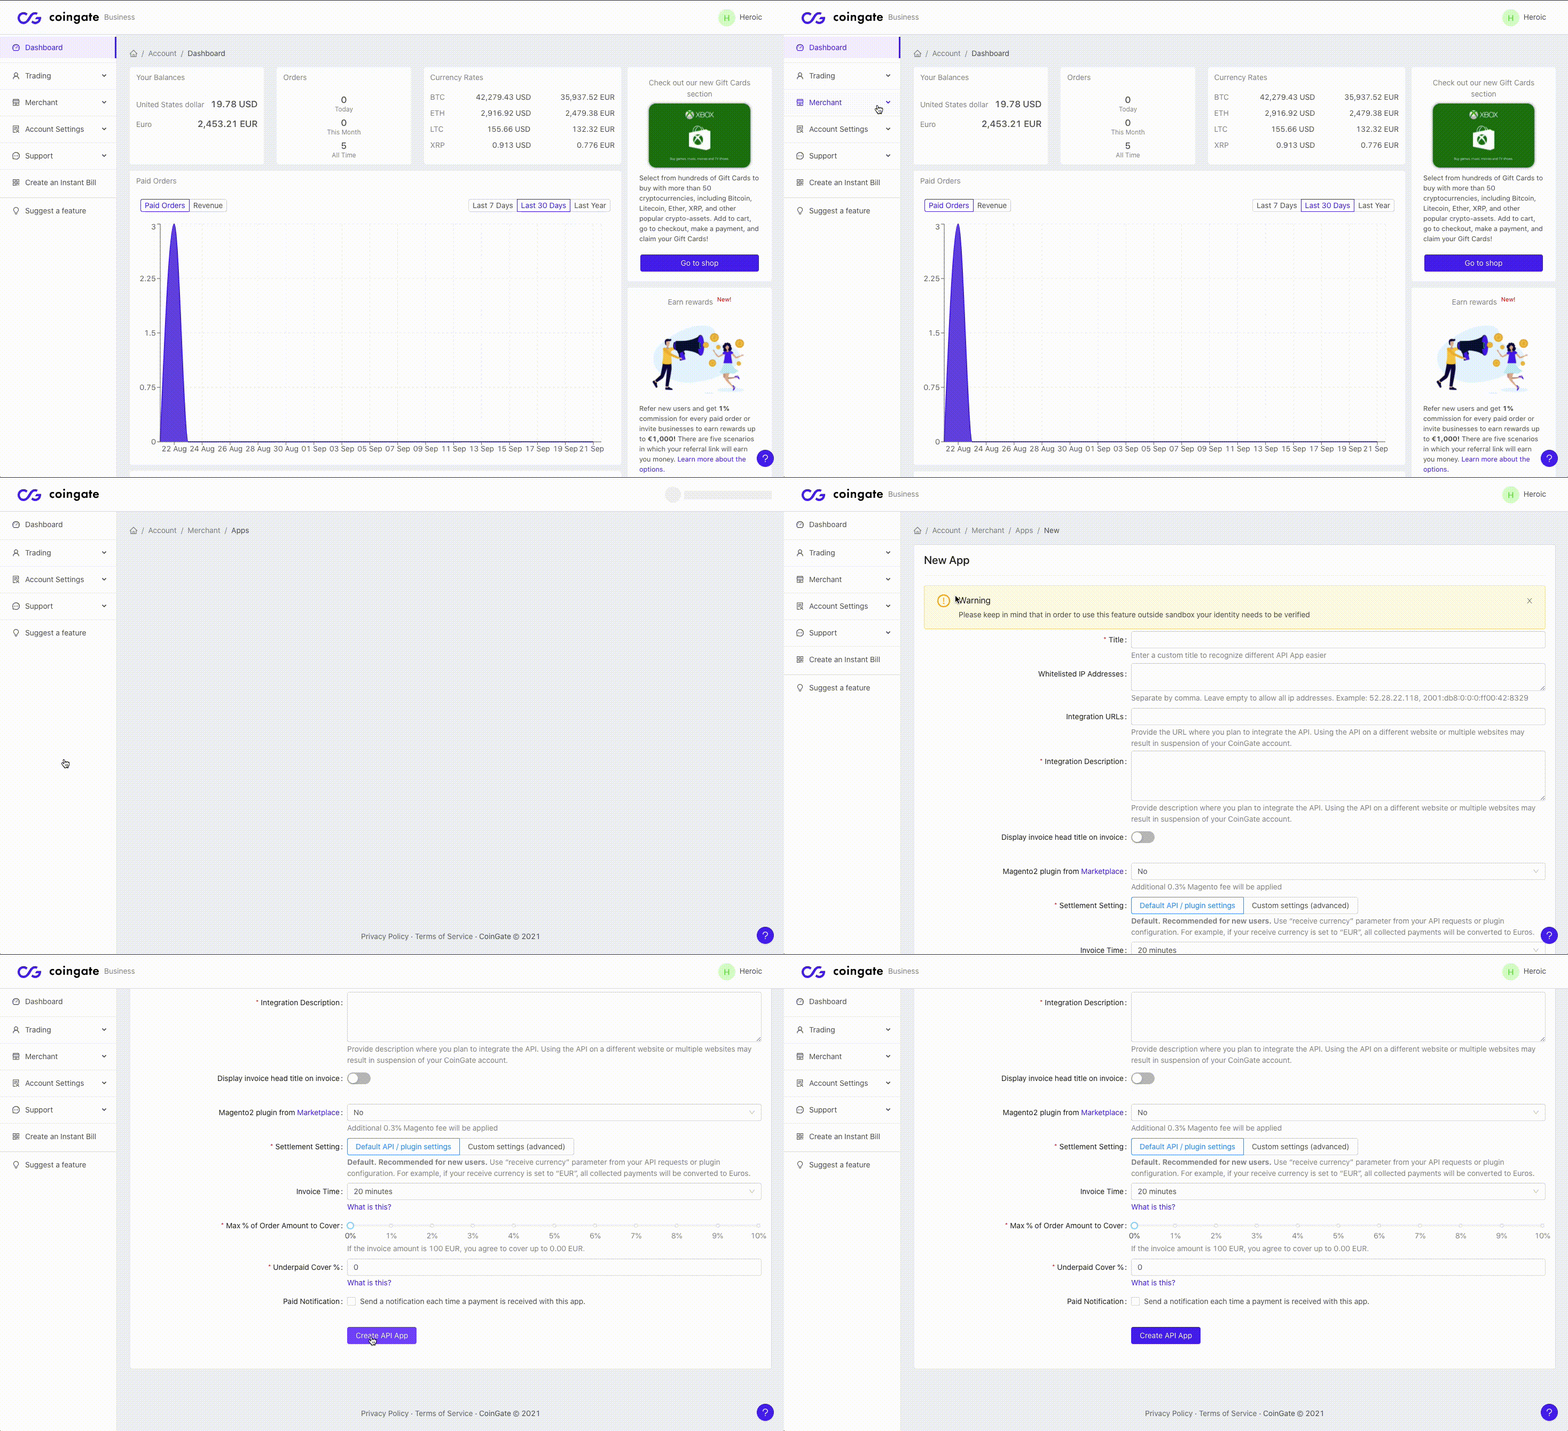
First, get your auth token from CoinGate

- Log in to your CoinGate account and create a new Access Token
- Copy your Access Token to a temporary document
Your Access Token will be in the following format: 8vzddvbtP9TiLsDFePPRqPy23d2e4sAGfzzvZiAA
Next, set up your CoinGate Billing Integration in Heroic
- Click on Settings and then CoinGate Billing
- Click on the Add New CoinGate Billing button
- Paste your access token into the Auth token field
- Click the Check Auth token button
Once validated, you'll be presented with more options in order to complete setup of your CoinGate Integration.
- Enter a name and description for your integration (this is for internal use only, to help you identify it later)
- Choose a currency from the Currency field
- Enter a purchase amount into the Amount field
- Click the Save Changes button
Connect you button with your CoinGate Integration

- Find the button that should launch the CoinGate Payment Form, and click the
 icon
icon - From the Choose Button Action field, choose CoinGate Billing
- Choose the newly created integration from the CoinGate Billing field
- Choose (or enter) the destination page you want to take people to once the transaction is processed
- Click the green checkmark icon to save your updates
You don't have a CoinGate account yet? Create one here, it's free.
