First, get your secret key from Stripe

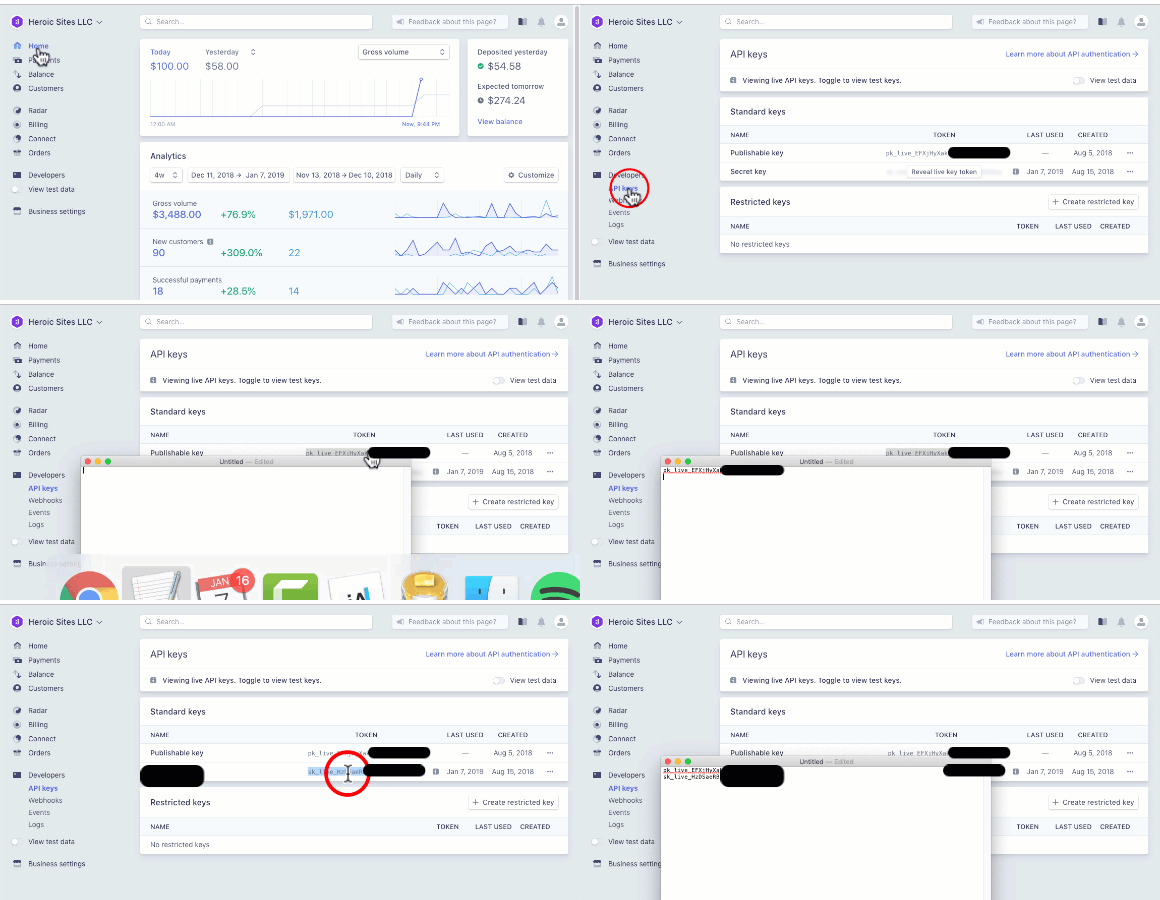
- Log in to your Stripe account and go to the API Keys page
- Copy your Publishable key to a temporary document
- Click on Reveal live key token and copy your key to the same temporary document
Your publishable key will be in the following format: pk_live_HzDSaR2y7s7yMUGBe7c9dH26s
Your secret key will be in the following format: sk_live_HzDSaRBr37yMUGBe7c9dH26s
Next, set up your Stripe Billing Integration in Heroic
- Click on Settings and then Stripe Billing
- Click on the Add New Stripe Billing button
- Paste your secret key into the Private key field
- Click the Check Private key button
Once validated, you'll be presented with more options in order to complete setup of your Stripe Integration.
- Enter a name for your integation (this is for internal use only, to help you identify it later)
- Paste the Public Key from your temporary document into the Public key field
If this is a one-time purchase:
- Choose a currency from the Currency field
- Enter a purchase amount into the Amount field
If this is a subscription purchase:
- Choose the product from the Product droplist
- Choose the payment plan from the Plan droplist
Complete the setup of your Stripe Integration:
- Enter the name for the top of the Stripe payment form into the Form Name field (this is usually just the product name)
- Enter a descripion for the Stripe payment form into the Form Description field (this is usually a 1 sentence tagline for the product)
- Select an image for the Form Image field -- this is image that will be used at the very top of the Stripe form
- Click the Save Changes button
Connect you button with your Stripe Integration

- Find the button that should launch the Stripe Payment Form, and click the
 icon
icon
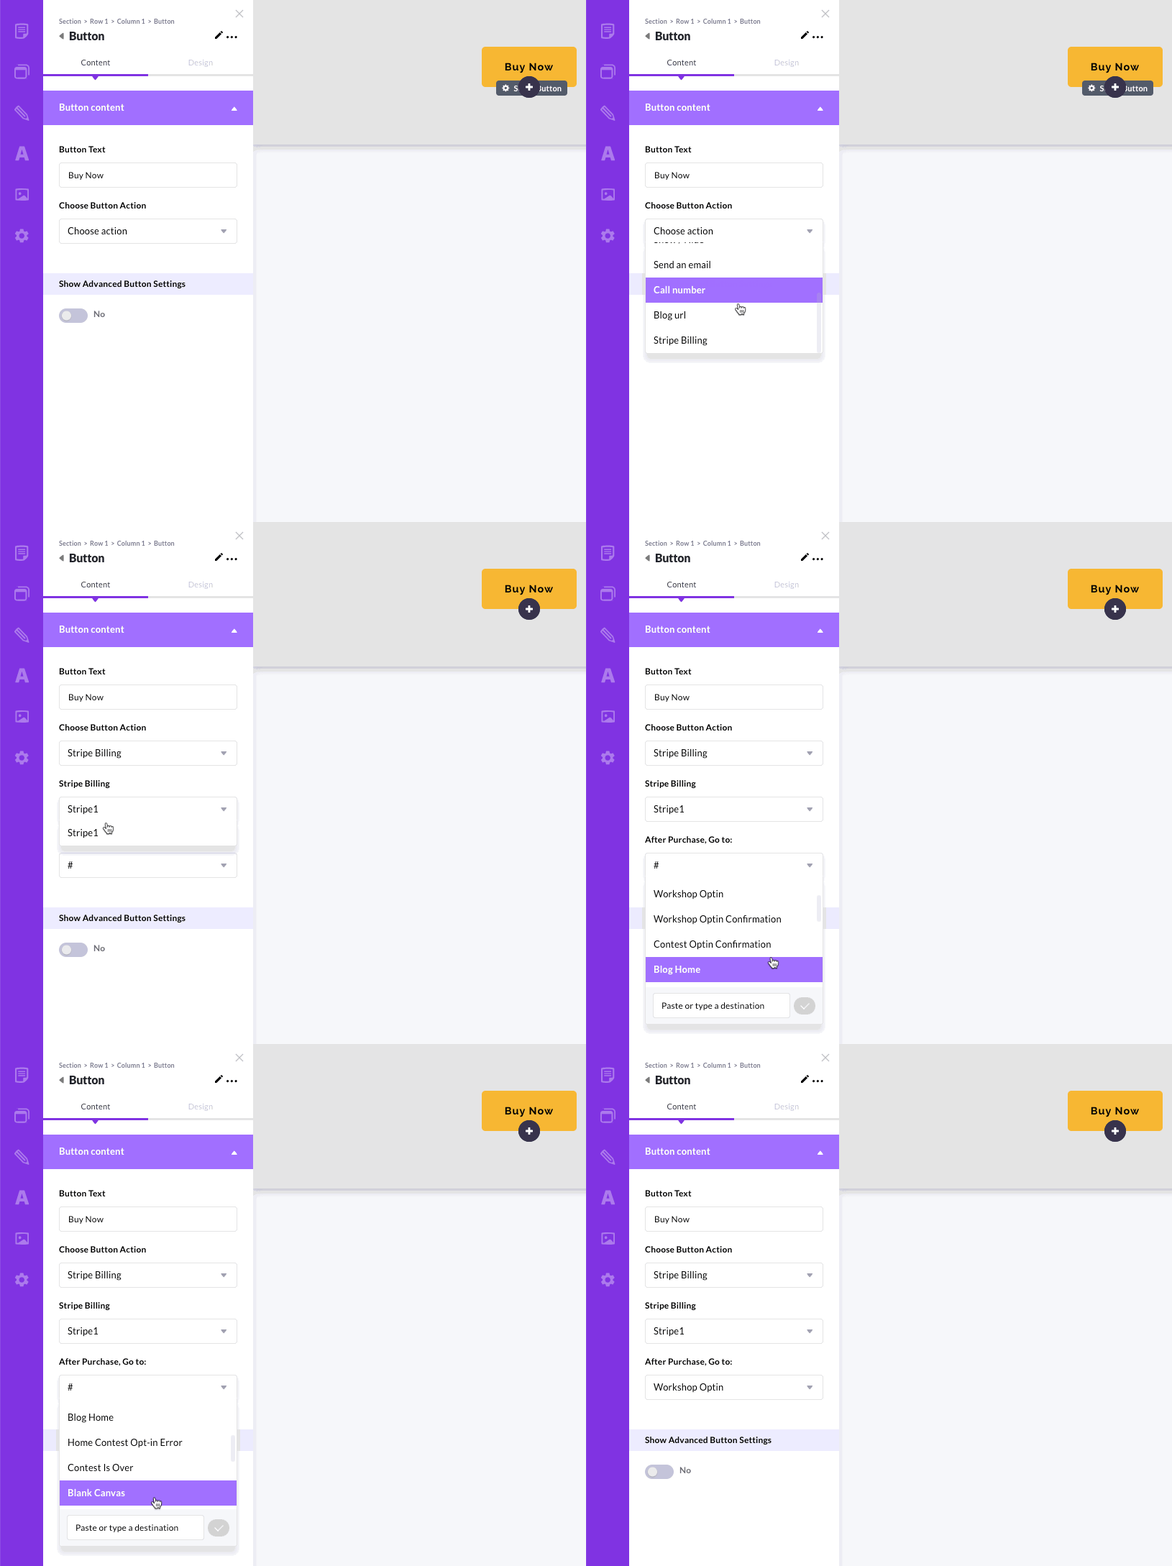
- From the Choose Button Action field, choose Stripe Billing
- Choose the newly created integration from the Stripe Billing field
- Choose (or enter) the destination page you want to take people to once the transaction is processed
- Click the green checkmark icon to save your updates
